Free-range, Cage-free, Vegetarian-fed, Pasture-raised Poultry

When it comes to buying chicken, you have lots of options available. If you’re trying to eat healthy, it can be very confusing which one you should choose. What do all these labels mean anyway? Sometimes I think these labels are marketing-driven, intended to make people think it’s healthy. Read on and decide for yourself.

Free-range
The minimum standard to meet this label is that the chickens must “have access” to and be able to forage over an open area for an unspecified amount of time during each day. It could be as little as 5 minutes, and the “access” could be a 12” square panel that gets opened from the chicken house to an outdoor area.  It doesn’t mean the chicken actually spent time outside. It’s true that many farmers will go above and beyond the minimum requirements and if you research the company and believe they use humane practices then this is probably fine.  Especially if it’s also labeled organic. But it doesn’t mean that the chickens were fed an all-natural diet, so keep reading for more info on that.

Cage-free
This means the same thing as Free-range.

Vegetarian-fed
These chickens were fed a plant-based diet. This is very interesting because chickens’ natural diet is bugs and grass plus whatever else they can get their little beaks on (they’re not too discerning according to my friend who raises them).  Chickens don’t naturally eat corn and soy but that’s  what they’ll eat when vegetarian fed. Since most corn and soy in this country is genetically modified, unless the chicken is labeled organic that’s probably what it ate. On the upside, at least the chickens weren’t fed recycled chicken parts.

Pasture-raised
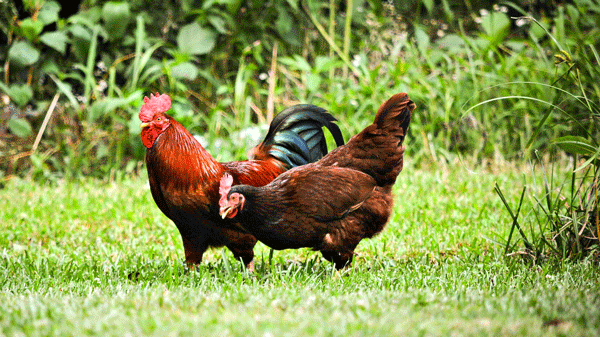
This, to me, is the real deal. This wonderful creature that just made up my evening meal actually spend the majority of its life in a field eating bugs and grass and other chicken-food stuff.  Organic pasture-raised chicken is the only kind I recommend.

Bottom line: Don’t fall for the marketing copy that makes it sound healthy when it’s really not. Buy organic pasture-raised chickens, preferably from a local farm.

Photo credit:  Kirsten Carr on Unsplash

Pros and Cons of Non-Stick Pans (and which kind is best for health)

I grew up in the era of better living through chemistry. When teflon-coated pans came out they were a life-saver for busy moms everywhere. Non-stick pans have evolved over the years and the days of little bits of chemical coating scraping off and entering your food are mostly behind us. Mostly.

In ths post you’ll learn about the five types of non-stick pans to help you make your next purchase a more informed one.

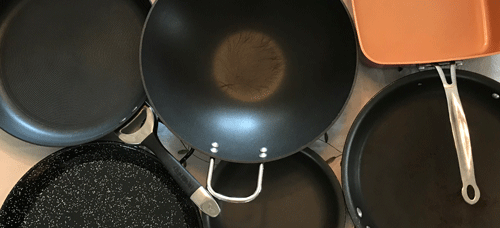
Based on my research, types of non-stick pans include teflon, copper, anodized aluminum, diamond, and thermolon.


Teflon
Pretty much everyone agrees that this is the worst kind of non-stick pan you can buy. First, it scratches easily, and second, the chemicals can get into your food. No brainer that this is a no-go.

Copper
A common concern with copper pans is that copper can leach into your food during cooking. However if you use copper pans that are lined with stainless steel on the inside, you get the benefits of copper (heat conduction and aesthetics) without the safety concerns. The relatively new Red Copper pans are lined with ceramic and so are reported to be safe (and beautiful too).

Anodized Aluminum
There is much conflicting information about this type of cookware. Although the anodizing process stops the aluminum from leaching into food, there’s evidence that the additional coating on some brands of anodized pans is similar to the chemical used in Teflon. Therefore I’m not recommending this type of pan without further research.

Diamond
Developed by a German company in the late 70’s, this cookware is made using one of the best non-stick technologies available. It uses diamonds and specially made steel to create an extremely durable piece of cooking equipment. You can find it on Amazon (but beware of sticker shock): Woll Non-Stick Diamond

Thermolon
This is a ceramic-based “green” non-stick coating technology that is considered safe as long as the brand states it’s PFO-free. The one downside seems to be that the non-stick properties of the ceramic coating degrade relatively quickly (some say within about a year), requiring regular replacement.

So there you have it! Personally I’ll stick to mostly cast iron, but when I need something lighter I’ll go with a ceramic lined pan.

[Note: When I get a chance to do further research into the anodized aluminum materials I’ll update this post.]

Yam Noodle, Snow Pea and Asparagus Toss

I’m thinking maybe add some cooked cocktail shrimp and have a complete meal!

Print Recipe
Yam Noodle, Snow Pea and Asparagus Toss Yum
Votes: 0
Rating: 0
You:
Rate this recipe!
Add to Shopping List
This recipe is in your Shopping List
Prep Time 15 minutes
Cook Time 10 minutes
Servings
people
Ingredients
Prep Time 15 minutes
Cook Time 10 minutes
Servings
people
Ingredients
Votes: 0
Rating: 0
You:
Rate this recipe!
Add to Shopping List
This recipe is in your Shopping List
Instructions
  1. Grate or mince ginger and garlic. Whisk together first 7 ingredients in a large bowl.
  2. Shave carrots into ribbons and add to sauce mixture; toss to coat. Set aside.
  3. Rinse snow peas and remove the little strings. Rinse and trim asparagus and cut into 2 inch pieces. Bring a large pot of water to a boil. Add snow peas and asparagus; cook until crisp-tender, about 2 minutes. Remove vegetables with a slotted spoon to a colander; rinse with cold water until cool. Add snow peas and asparagus to carrot mixture.
  4. Add yam noodles to boiling water; cook until just soft, 6-7 minutes. Drain and rinse with cold water. Add to bowl; toss well. Slice basil and sprinkle over top.
Share this Recipe
 

Own Your Health!

This 8-week program starts the week of June 17
Take each weekly online module on our own time, from any location with internet connection

Enter Your Email
Choose Payment Option


Elimination diets can:

  • Reduce inflammation
  • Relieve pain – joint pain, headaches, back ache
  • Reduce puffiness and unexplained skin conditions
  • Relieve autoimmune symptoms
  • Bring back the youthful look of your skin, hair, and nails
  • Reduce stress and improve sleep
  • Help you feel better and live longer

Each module contains:

  • 20-30 minute training video
  • Printable handouts: meal plans, recipes, shopping lists, hints & tips, checklists, and much more
  • 2 – 1 hour Live Q&A sessions every week (Sunday 2 pm ET or Wednesday 7 am ET – come to either or both!)
  • Private Facebook support group to ask questions and get support

Modules include:

  •  Week 1 – Intro: Preparing for Elimination; Gut health; Mindfulness
  •  Week 2 –  Starting the diet; Finding an accountability partner; Tracking
  •  Week 3 – High nutrient density foods; Staying motivated; Getting family support
  •  Week 4 –  Batch cooking; Automation; Reducing stress
  •  Week 5 – Medical support; Vitamins and supplements; Asking the right questions
  •  Week 6 –  Getting over the hump; Fermented foods; Healing foods
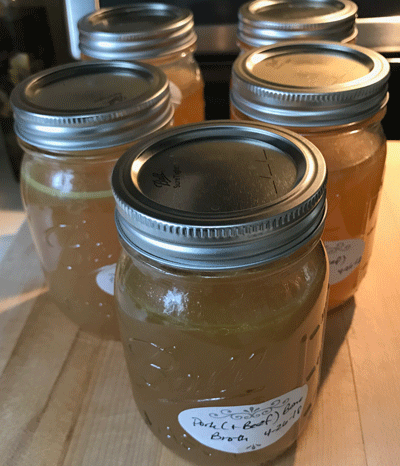
  •  Week 7 – Make your own: yogurt, tortillas, kombucha, broth
  •  Week 8 –  Reintroduction; Things to watch for; Community support

Pricing

  •  Launching Fall 2018 for $3,700!
  •  The “early bird” (30-day advance) pricing will be $2,000
  •  Sign up for the pilot tonight before midnight – $947 (must pay in full)
  •  Final offer: sign up by 8:00 pm for just $798
  •  Pay $399* now; balance due in 30 days (6/14)
  •  (or pay $748 in full now for an add’l $50 discount!)

Enter Your Email
Choose Payment Option


Beets – A Lesson in Frugality

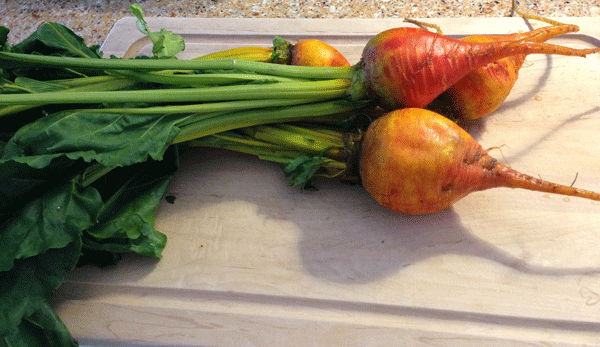
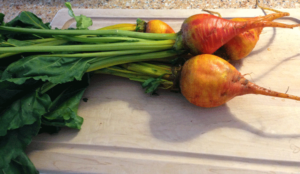
Whole Golden BeetsBeets are the ultimate in nutritional usefulness.  Each part of the beet is nutritionally useful, and even the few small parts you don’t want to eat can be fed to your garden in the form of compost.

Golden beets are beautiful and sweet, and according to some sources are much lower in starch than their red cousins.  So if you are reducing starch in your diet for health reasons, golden beets are OK!  Also, red beets are a pain with their sheer redness, which gets all over everything in your kitchen.  I’ve already got stains on everything from all the turmeric I’m consuming, and add the red “blood” from beets and I’ve got sunset-colored cutting boards and wood-handled knives, not to mention my hands…  Ah the price for health.  But I digress…

Beets can be divided into three uniquely useful parts: the roots, the stems, and the leaves.

Roots: The root bulb is the most deliciously sweet part of the plant.  The easiest way to cook the beet root is in foil packets on your grill (btw you can skip the peeling step and eat them with the peel on).  Another way is to simply peel them and steam them, then drizzle with a little olive oil and salt and serve warm. Continue reading “Beets – A Lesson in Frugality”