Egg, Toast & Juice

Got a bunch of back-to-back meetings this morning? This 10-minute breakfast will keep you sated until at least late-morning. Don’t forget to grab a granola bar to munch on in between meeting number 2 & 3!

1 egg, fried or boiled. If frying use organic canola spray.
1 thick slice of Low Gluten Bread with 1 tsp Earth Balance spread
1 8 oz glass of Bolthouse Farms Green Goodness juice (I thin it out with about 2 T of water because it’s technically a smoothie and is very thick)

Total calories: 330
Egg 90
Bread + spread 100 (I’m guessing)
Juice 140 (less if you thin it down like I do)

If you’re a big person or very active you’ll need more calories. Have another egg and half again as much juice. Skip the extra bread. Your total calories will be closer to 500.

Low Gluten Multi-Grain Bread – version 1

Low Gluten Bread
Fresh out of the bread maker

I made this bread for Easter dinner. I should not experiment on a holiday I know, but Trader Joe’s was closed and I wanted a nice bread that wasn’t white and processed, and ideally gluten-free. Gluten-free bread takes too long because it’s not bread machine friendly, so I concocted this mash-up of 1/2 regular whole wheat and 1/2 gluten-free bread recipe for the bread machine. It’s not perfect, but it was good enough for Easter dinner.

1-1/2 C water, warmed in microwave
2 T oil
2 T honey
1 egg
1 t salt
1/8 C ground flax
2/3 C almond flour
1 C brown rice flour
1 C masa de harina
2/3 C Whole wheat flour
2/3 C white bread flour
1/2 C potato starch
1/4 C fat free milk powder
1 t xanthan gum
1 T yeast

Put in bread machine in this order, or in the order recommended by your particular machine. It’s a 2lb loaf however it comes out small and dense so a smaller machine could probably do it. Just make sure to put it on Dark crust so it will get a longer cooking time than a 1-1/2 lb loaf.

Eating notes:
– Tasty but not very sweet.
– Dense but makes good thin slices that toast well
– It freezes also freezes well.

Things to try next time…
– try 3 T ea oil and honey
– more flax meal
– lighter starch?
– replace almond flour with something else… spelt?

NPR’s GF Cookies

I was searching for GF cookies for the holidays and lo and behold, found this super-yummy-looking recipe for Gluten Free Almond Butter Chocolate Chip cookies.

http://www.npr.org/2012/02/14/146875315/almond-butter-cookies

Almond Butter Chocolate Chip Cookies
Photo Credit: Nicole Spiridakis / NPR

Haven’t tried it yet, but they look promising.  Once I manage to try them I’ll surely come back and update you.  If anyone tries them before me, feel free to let us know the results.

Gluten Free Pumpkin Muffins

Whodathought you could make GF muffins that don’t taste GF?

I made these with freshly puréed roasted pumpkin that I made from a leftover Halloween pumpkin (uncarved!). I brought some to work and left them in the break room, and found this note stuck to the empty plate.

20121205-211017.jpg
P.S. I made these in a toaster oven with a convection option.

Lisa’s Gluten-Free Pumpkin Muffins

Wet Ingredients:
1/4 C Butter
3/4 C Sugar
2 eggs
1 tsp vanilla
2 C fresh pureed pumpkin (drained)

Dry Ingredients:
2/3 C brown rice flour
2/3 C gluten-free oat flour
1/3 C almond flour
1/3 C tapioca starch
1-1/2 t xanthan gum
1 T baking powder
1 t baking soda
1/2 t salt
1-1/2 t pumpkin pie spice

Directions:
1. In a large mixing bowl, cream butter and sugar until fluffy. Add eggs, mixing after each one. Add vanilla and pumpkin and blend well.

2. In a separate bowl, mix all dry ingredients together well.

3. Gradually add dry ingredients to wet pumpkin mixture. Use mixer on low to mix until just blended. Do not over-mix.

4. Preheat oven to 350.

5. Wipe muffin tin cups with a light coat of oil. A non-stick 12-muffin pan is ideal.

6. The dough will be heavy and dense. Use a large table spoon to scoop dough into cups. It should mound slightly above the surface of the tin.

7. Bake for 18-20 minutes.

Let cool slightly in the tin and then use a butter knife to gently pry each muffin out. Cool completely on wire rack.

Venison (Deer) Stew Recipe

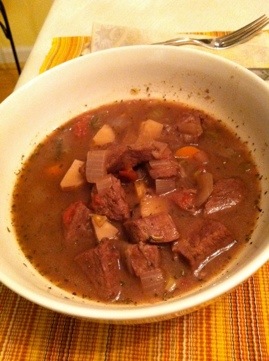
My husband’s friend at work is a frequent hunter so we were recently the beneficiaries of a three pound bag of this delicious lean meat. Last week we finally took it out of the freezer and let it thaw in the frig for several days. Today we have a huge pot of venison stew.

This big pot of stew cost us all of about $6 in vegetables and miscellaneous ingredients, since the meat itself was free!

20121209-200719.jpg

If you find yourself with a hunk of venison from a hunter-friend and you’re not sure what to do with it, give this a try, I really think you’ll be surprised at how wonderful this basic stew is. The meat is definitely the star of the show!

Ingredients:

3 lbs venison meat
olive oil
all purpose flour
2 large onions
4 stalks celery (plus some leaves if there are any)
2 large carrots
2 medium parsnips
4 cloves garlic
2 jalapeno peppers
1 can organic diced tomatoes
1 C red wine
5 C beef stock
3 bay leaves
1 Tbsp Herbs de Provence
salt and pepper

Tools:

Large non-stick pot
plastic spatula
large plastic spoon
large santoku-style knife
small paring knife
several small to medium sized bowls
re-purposed scrubber
peeler
wood cutting board

Directions:

  1. First cut up all vegetables and place into bowls. Different vegetables cook differently so I find it helpful to put certain vegetables together: onions and celery, carrots and parsnips, garlic and jalapenos. Then I’ll add the vegetable “groupings” to the pot at the same time.
  2. Cut up the meat into stew sized pieces, cutting against the grain. Place meat in a large zipper bag.
    Add 1/3 C flour, salt and pepper (to taste) to the bag. Seal the bag making sure there’s plenty of air in the bag and shake up the meat to coat it.
  3. Put about 2 Tbsp oil in the pot and turn to medium heat.
  4. Dump half the meat from the zipper bag into the hot oil and brown meat on all sides. This takes about 4-5 minutes. [Don’t worry about doing this perfectly, just toss the meat around every half minute or so and you’ll get most of it browned.] Remove the meat to a large bowl and do the same thing with the other half. Add a little more oil to the pot if needed, about a teaspoon at a time. Remove the second batch to the bowl as well.
  5. Add a tiny bit more oil if you need to, and add the onions and celery to the pot. Saute these briefly until they start to soften.
  6. Add the carrots and parsnips and continue to saute until the vegetables start to brown.
  7. Finally add the garlic and jalapeno and saute for another minute or so.
  8. Add the red wine to the pot and scrape the bottom of the pan with a wooden spatula to release whatever yummy stuff has stuck to the bottom of the pan. Let that simmer for a minute.
  9. Add the meat, tomato, stock, and seasonings to the pot and bring to a boil.
  10. Reduce heat to a low simmer, cover, and let cook for an hour. Check it occasionally to make sure the simmer is low and that you aren’t losing liquid. You can add more stock to the pot if you like. Just don’t add stock or water within the last 20 minutes or the flavors won’t all have time to blend.

Serve with crusty whole grain bread, preferably home made!
[Note: Most seasoned makers of venison stew claim that slow cooking is the best method. Deer meat is lean but it is not super-tender in general. I would have to agree that if this stew was made in the slow cooker it probably would be a lot more tender. I have’t tried it yet since hunting season is over, but if you do try that please let us know how it turns out! If you’re wondering how, just put everything in your slow cooker at step 9 and cook it on low for 6-8 hours.]

Nutrition Information:

Servings: 6
Calories: 461
Protein: 55 g
Fat: 11 g
Carbohydrates: 24 g
Fiber: 4 g
Sugar: 8 g
Sodium: 646 mg

An Easy Way to Pit Olives

I was making Moroccan Chicken in my new cast iron dutch oven tonight when I was faced with removing the pits from about 30 green olives.

Pitting Olives the Easy Way
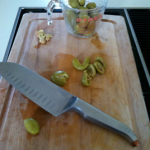
Place the flat blade of your knife over an olive.

I had meant to buy pitted ones but I was in a hurry at the store and just grabbed the whole non-pitted ones without thinking.

So I did a little research and found this neat trick for pitting olives. It does make a bit of a mess of the olive, but when you’re just adding them to a stew, who cares?

[Note: Apparently olives with pits are moister than their pitted relatives and impart much better flavor to your food.]

Take an olive and place it on your cutting board. Take a large knife, and with the side of the blade press down on the olive until you feel it “give.”

Pitting Olives, Remove the pit
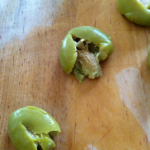
The pit practically pops right out of the olive.
Lift up your knife to reveal a flattened olive that’s been burst open on one end. Pick it up and pull the pit out with your fingers.

[Another Note: Look for the little stem that sometimes is still sticking to the end of the olive, and remove it. In my 1-1/2 cups of olives I found three with the stems, so just keep an eye out.]